
Two Injection Toolbar Models. One Effective Solution.
April 21, 2021
Invest in a 3-Pt. or Pull-Type Toolbar?
That is the question. A better question? Why not both? Now you CAN have both without the expense of two separate injection toolbars. Here’s how.
Meet the Standard Flex Toolbar. You saw the concept first with the release of the Quick Attach Series in August of 2020. In case you missed it, the QA Series allows operators to ‘quickly’ switch between a tank bar application and 3-Pt. toolbar dragline application using the same manure injection bar. This user-friendly solution is a result of a (product line-specific) universal quick attachment, shared plumbing components, and hydraulic quick-connections. This concept has been reworked and applied to the Flex design to achieve a ‘quick switch’ between a 3-pt. and pull-type toolbar for dragline application, again, using a single manure injection bar.
The Standard Flex Toolbar comes in widths from 26′ to 36′ wide and can accommodate Phantom unit spacing from 16″ to 30″, giving operators the capability to conservatively hit GPA’s from 2,500 to 12,000. Flex upgrade options, like 8″ plumbing and Phantom Edge Series units, will allow GPA rates up to 20,000+. (Important: Be mindful of additional weight and tractor size requirements associated with an 8″ plumbing upgrade, as well as, wider bars with narrow unit spacings.)
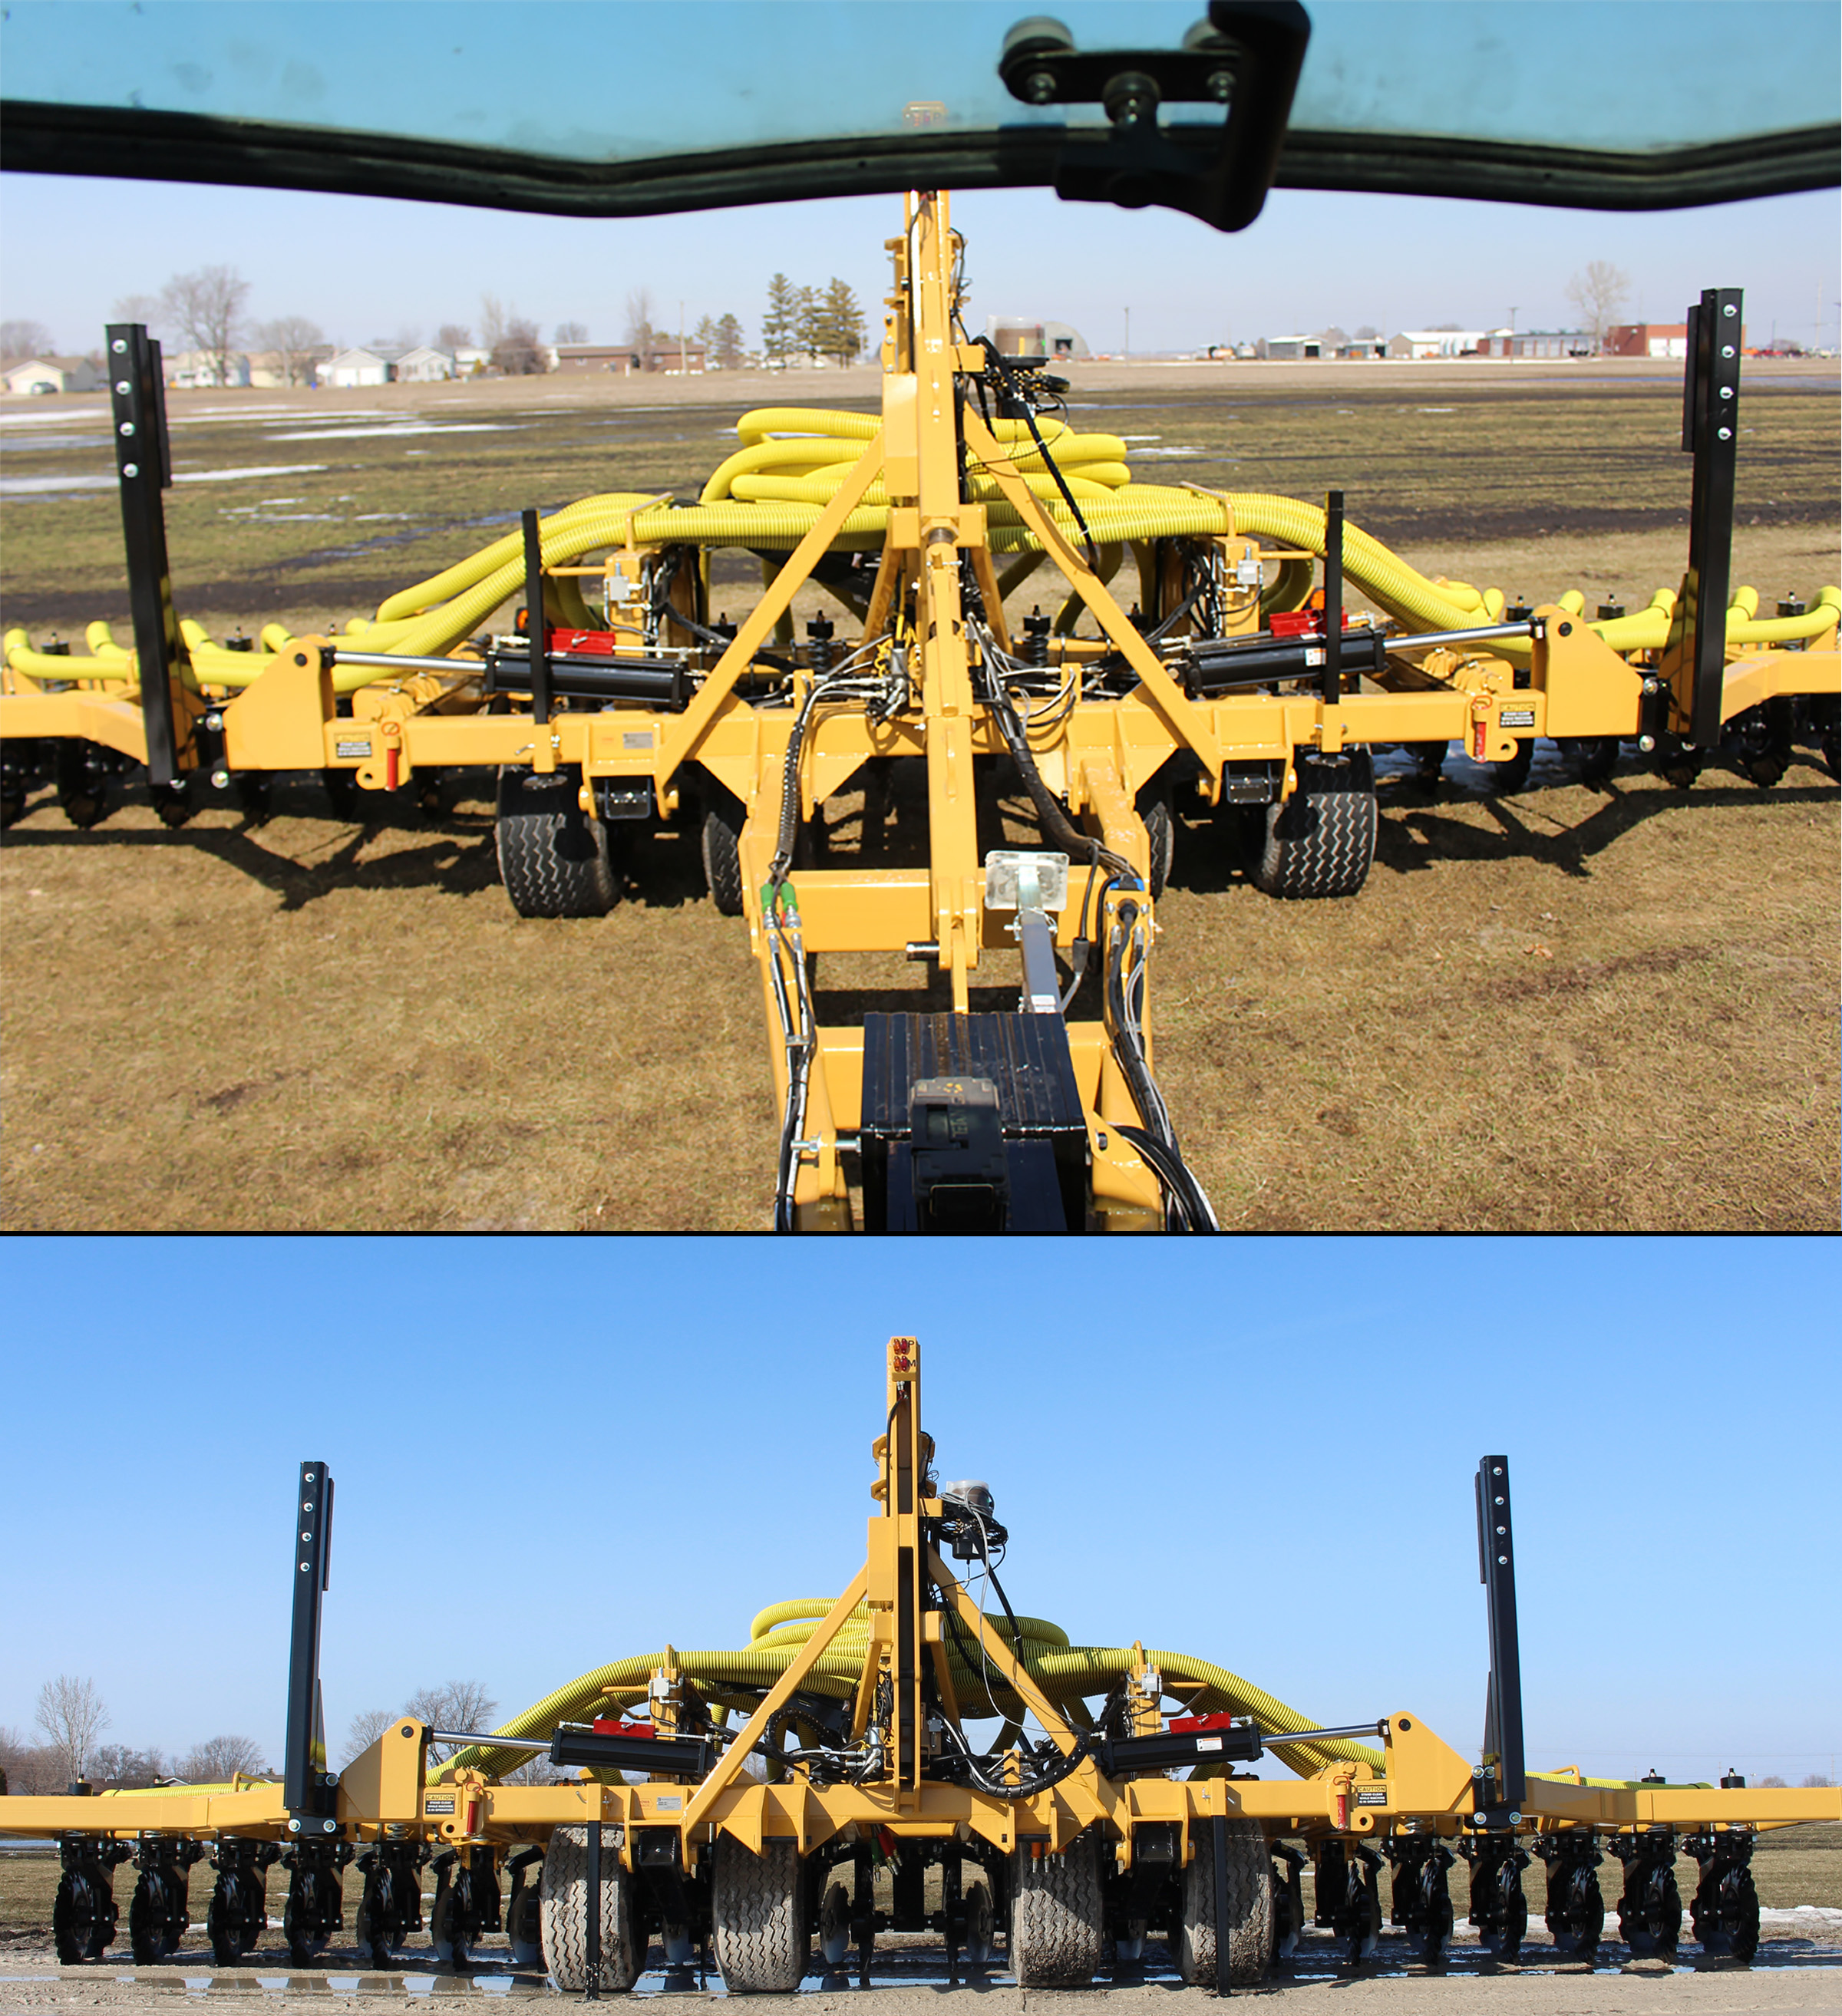
The Standard Flex Toolbar displayed above is equipped with Phantom Edge Series units.
Why?
The idea of Flex came to life when a recurring pain point consistently surfaced. Most individuals within the manure application realm know (and some, maybe all too well) that crews often battle very wet and less than ideal field conditions when it’s go-time. The last several pumping seasons have been exceptionally wet, which has resulted in some jobs becoming next to impossible to complete, or at least to complete on the farmer’s timeline.
A toolbar that can dub as a 3-pt. and pull-type, is beneficial in more ways than just the financial sense we’ve previously hinted at. The ability to shift the weight from the toolbar to the tractor (3-Pt. style) for better traction in wetter conditions, helps applicators get into fields quicker after a rain. Smaller fields can also present challenges to an operator from a maneuverability standpoint, which is where a 3-pt. toolbar might be best suited for the job at hand.
That same operator might travel to the next job that same day with that same bar and have a larger field to tackle, benefiting from a pull-type style application. The Flex design also accommodates customer preference. If one customer requires manure to be injected on the end-rows to reduce the amount of liquid on the field surface, operators can easily accommodate by re-attaching the pull-type tongue to their Flex toolbar. #FLEXibility
Exactly How Seamless is this “Switch” Process?
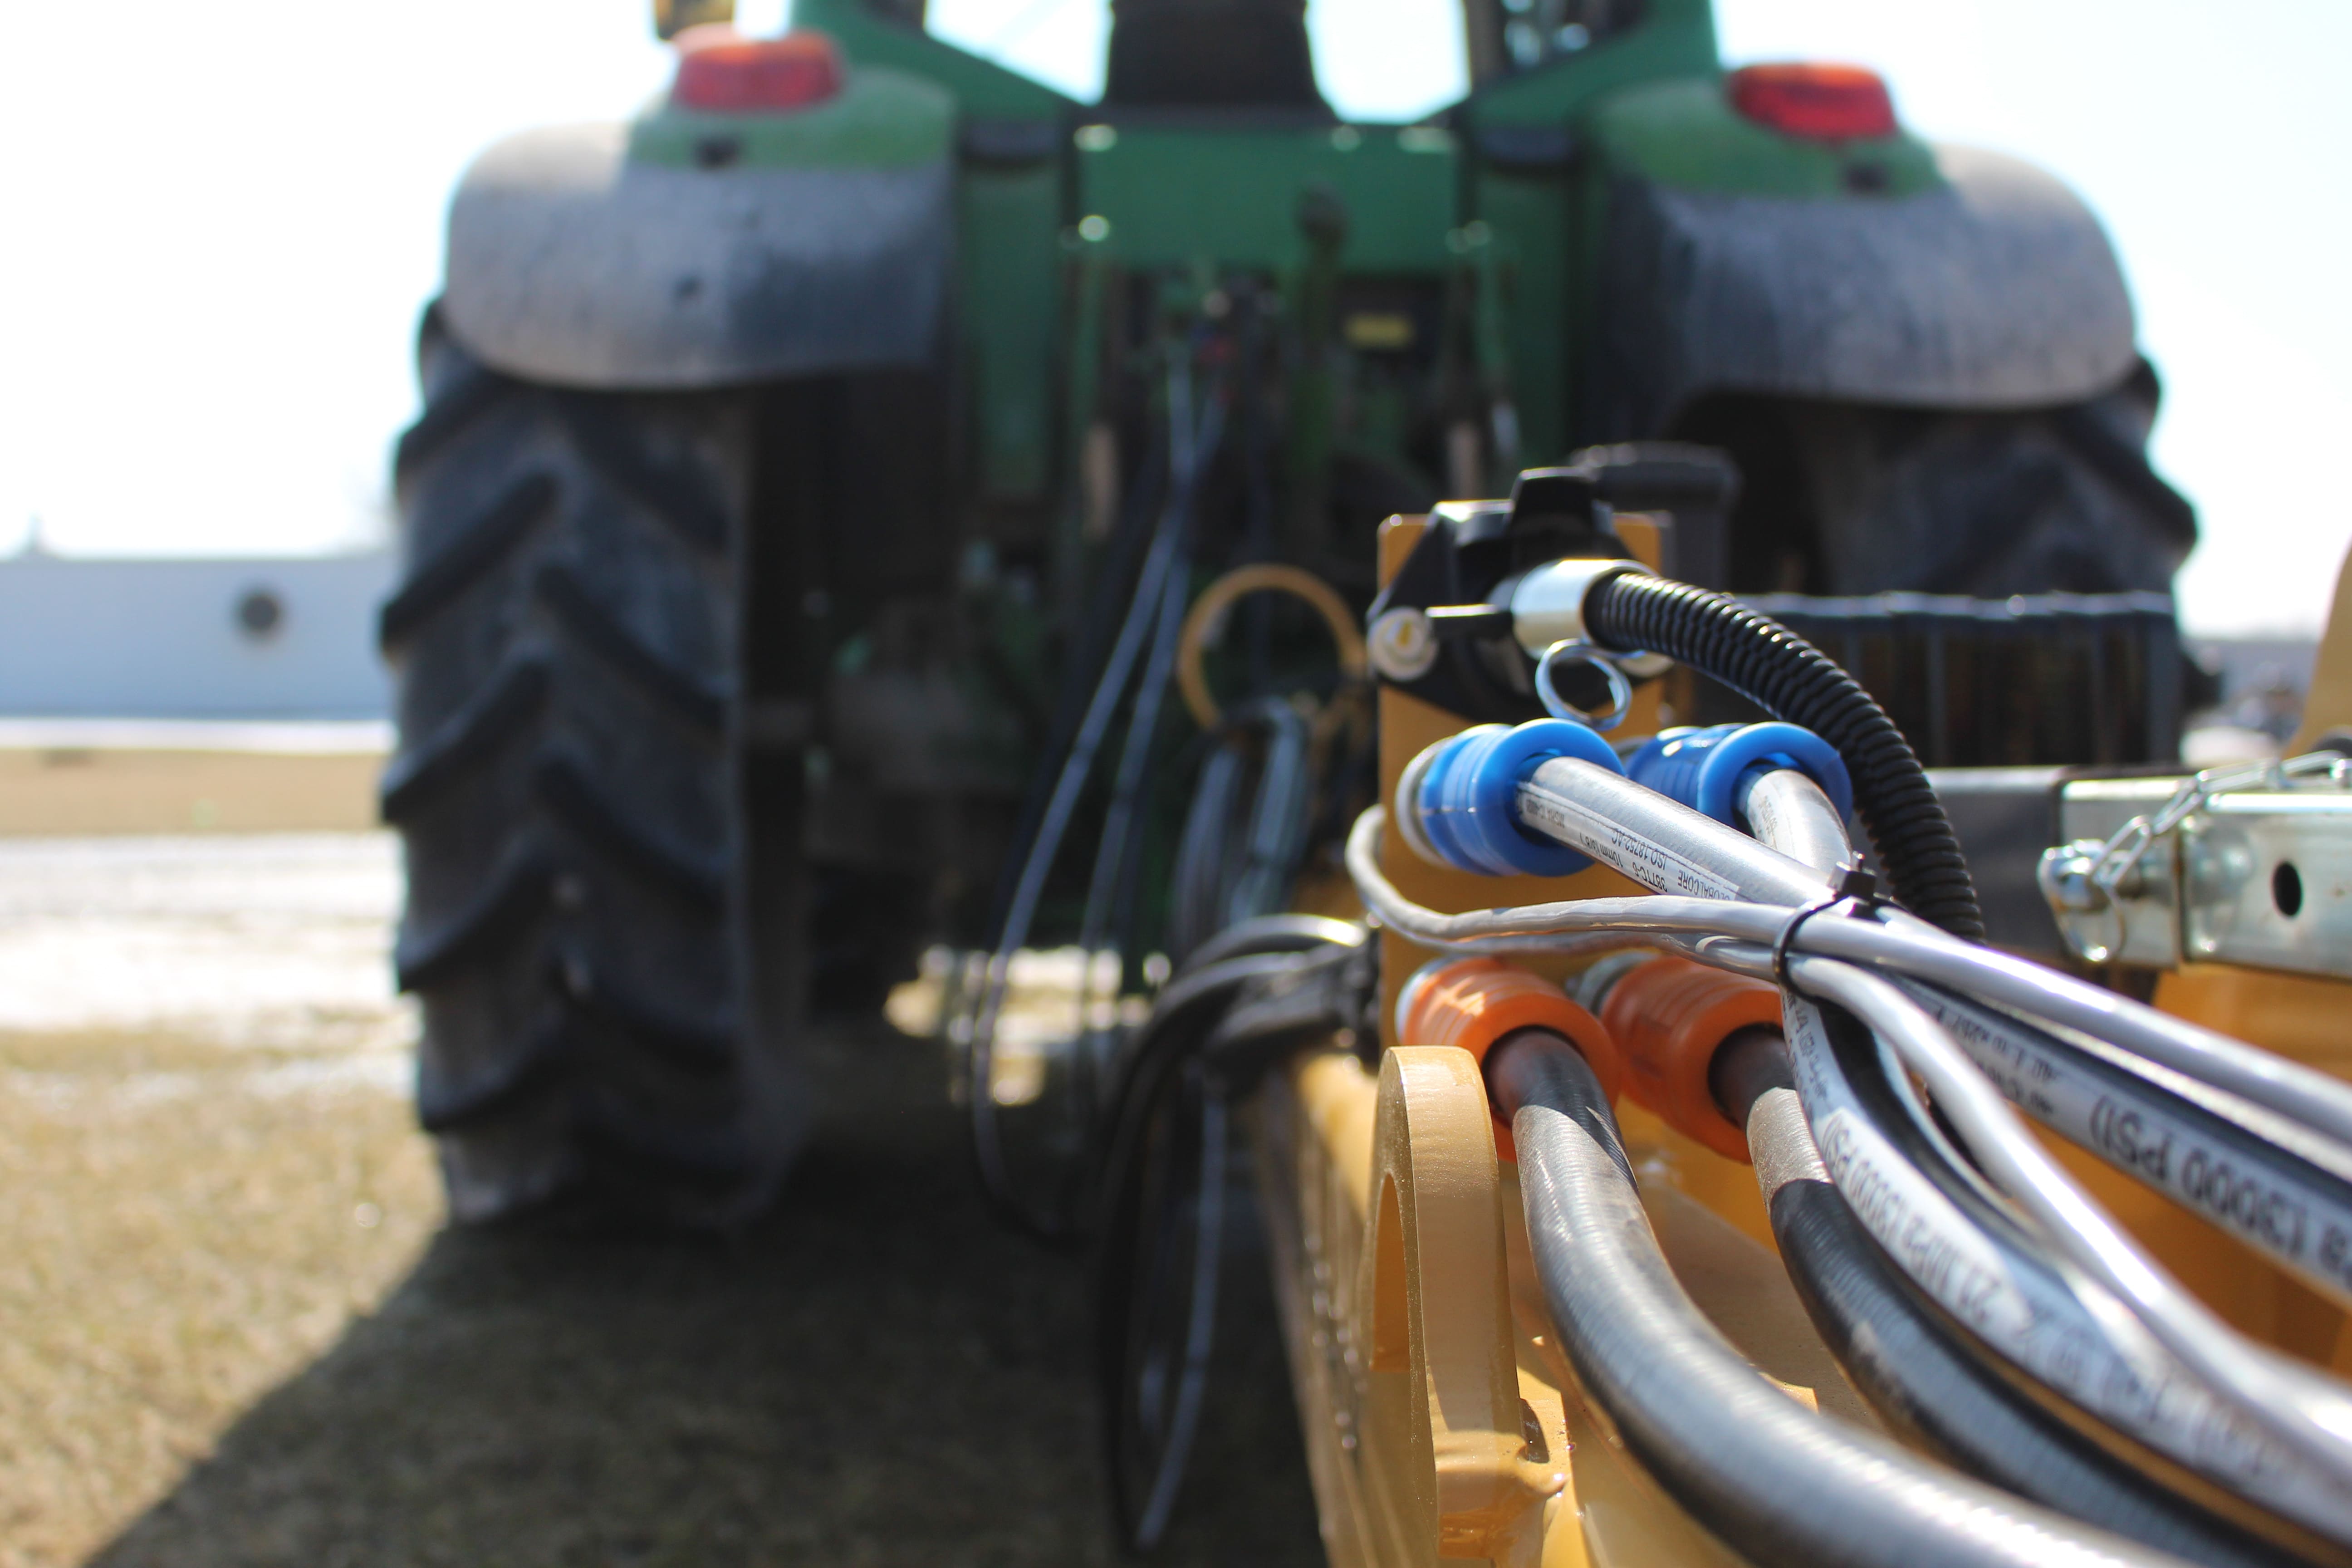
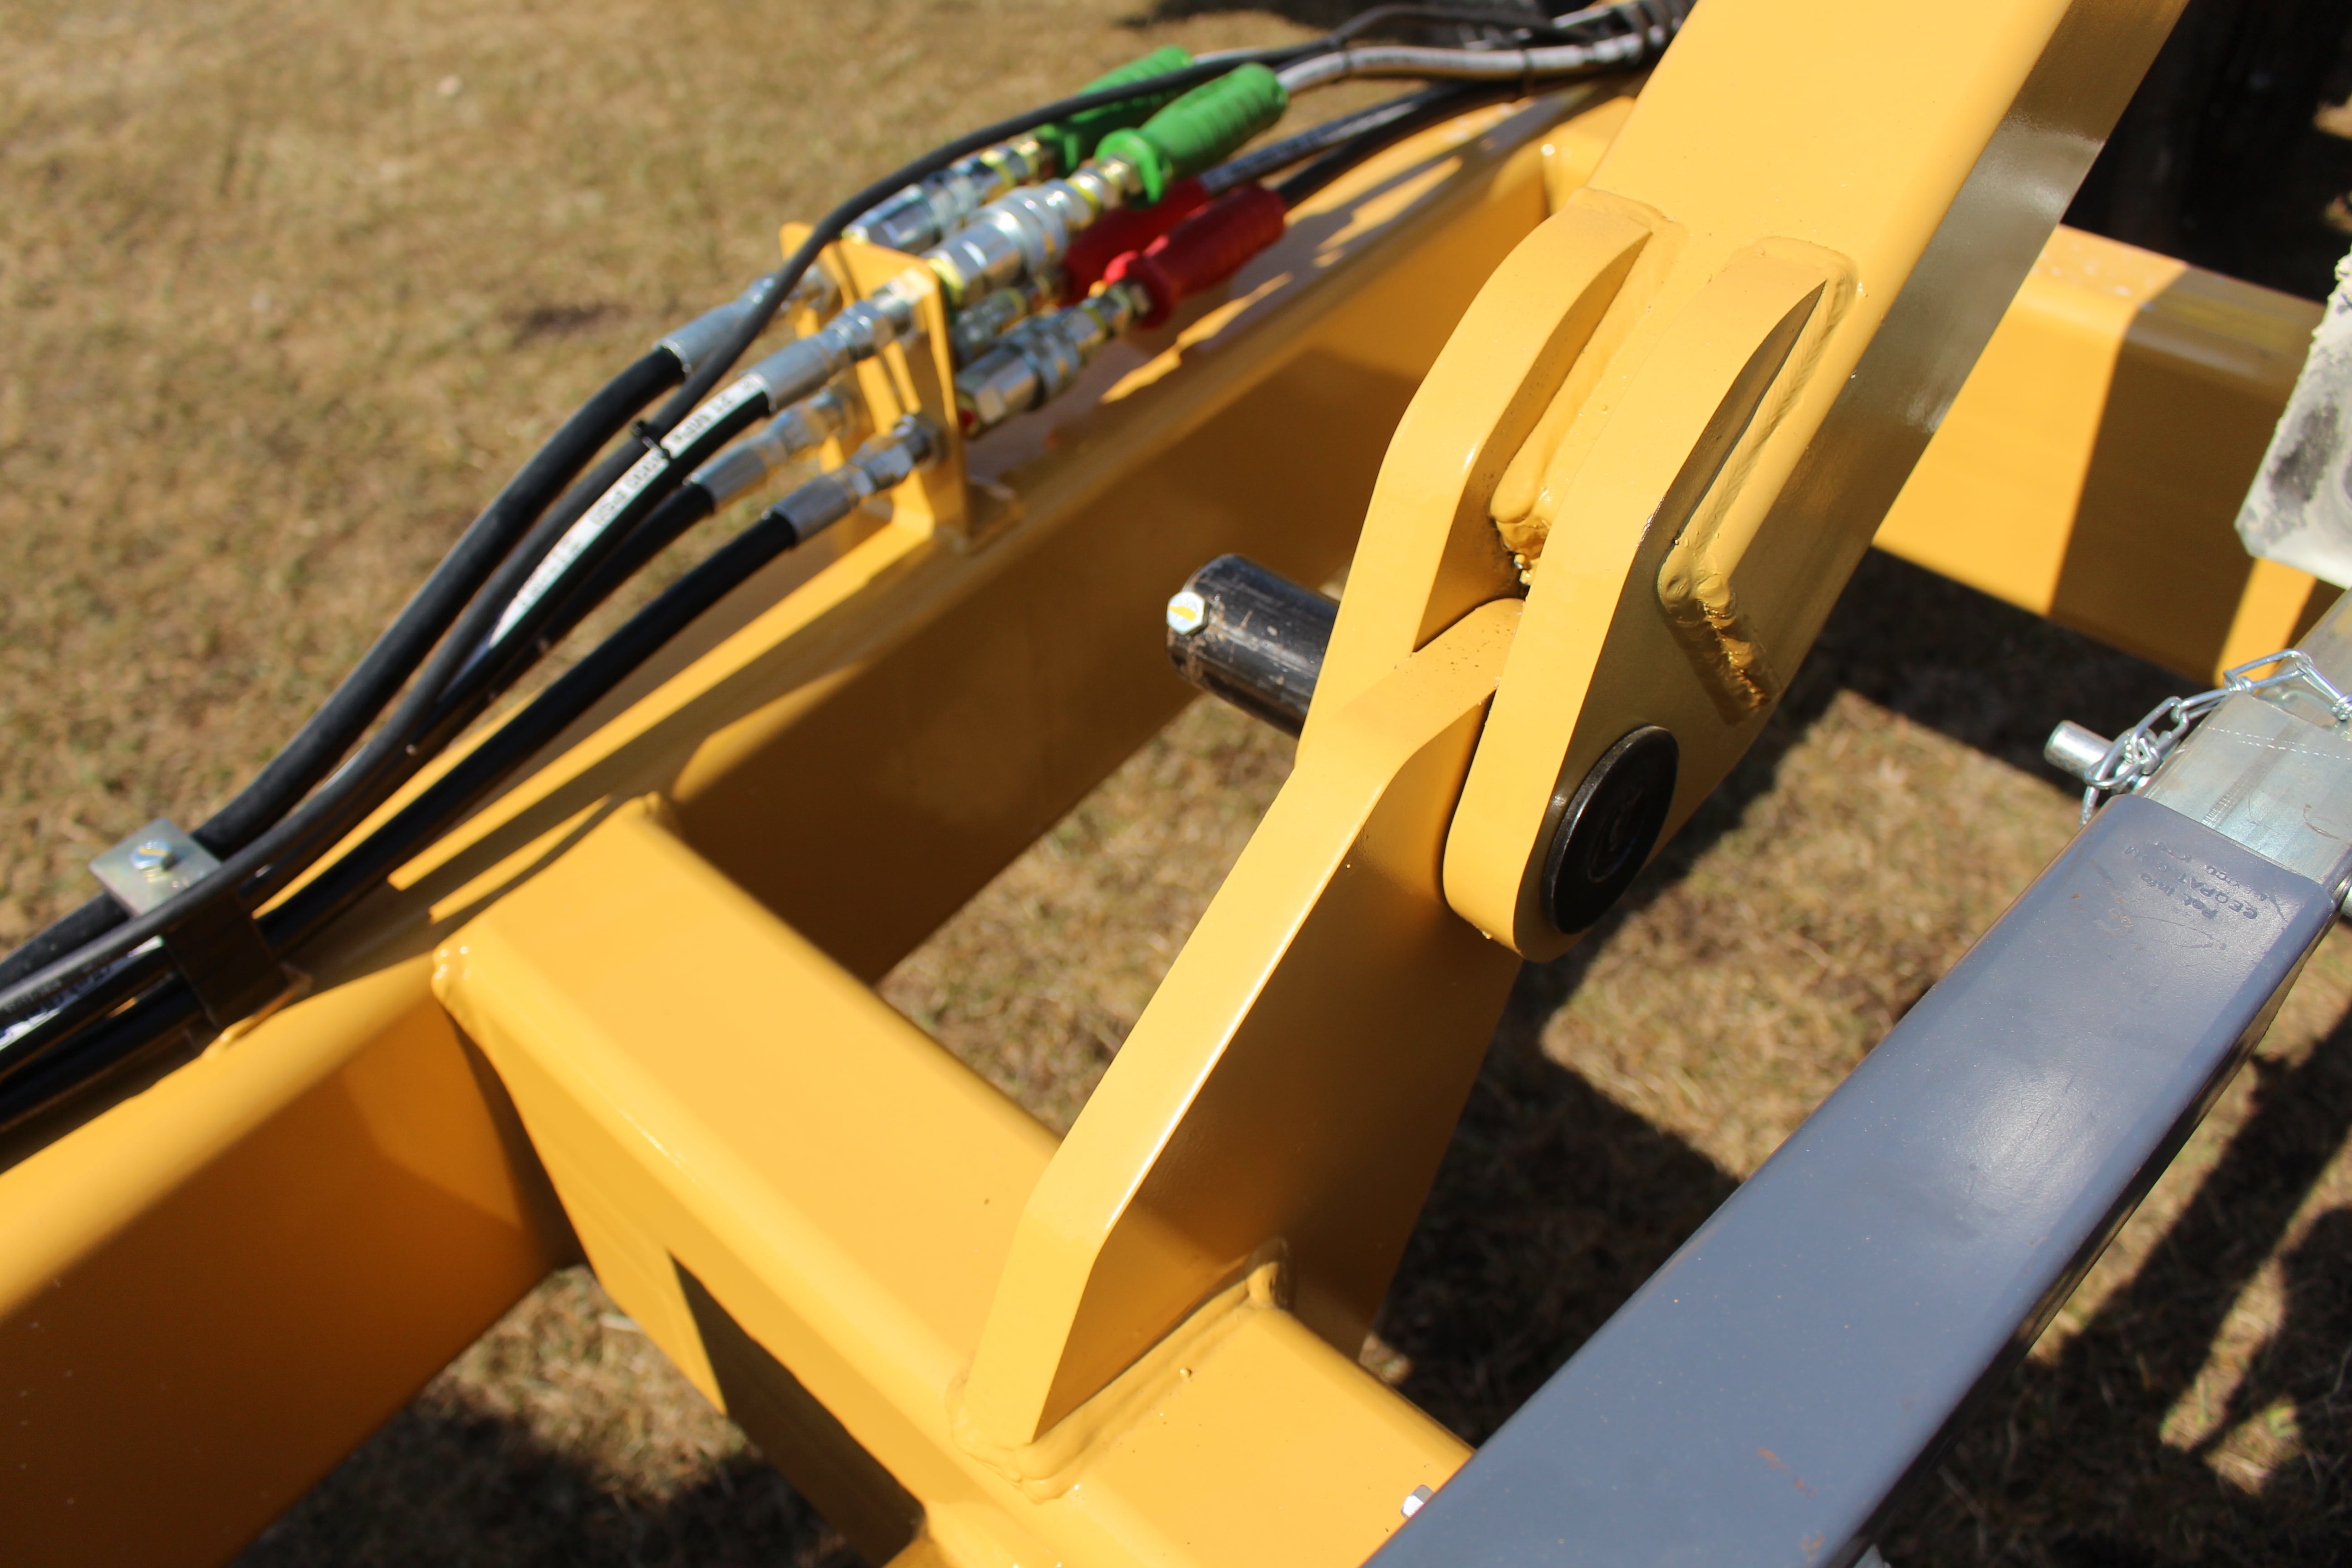
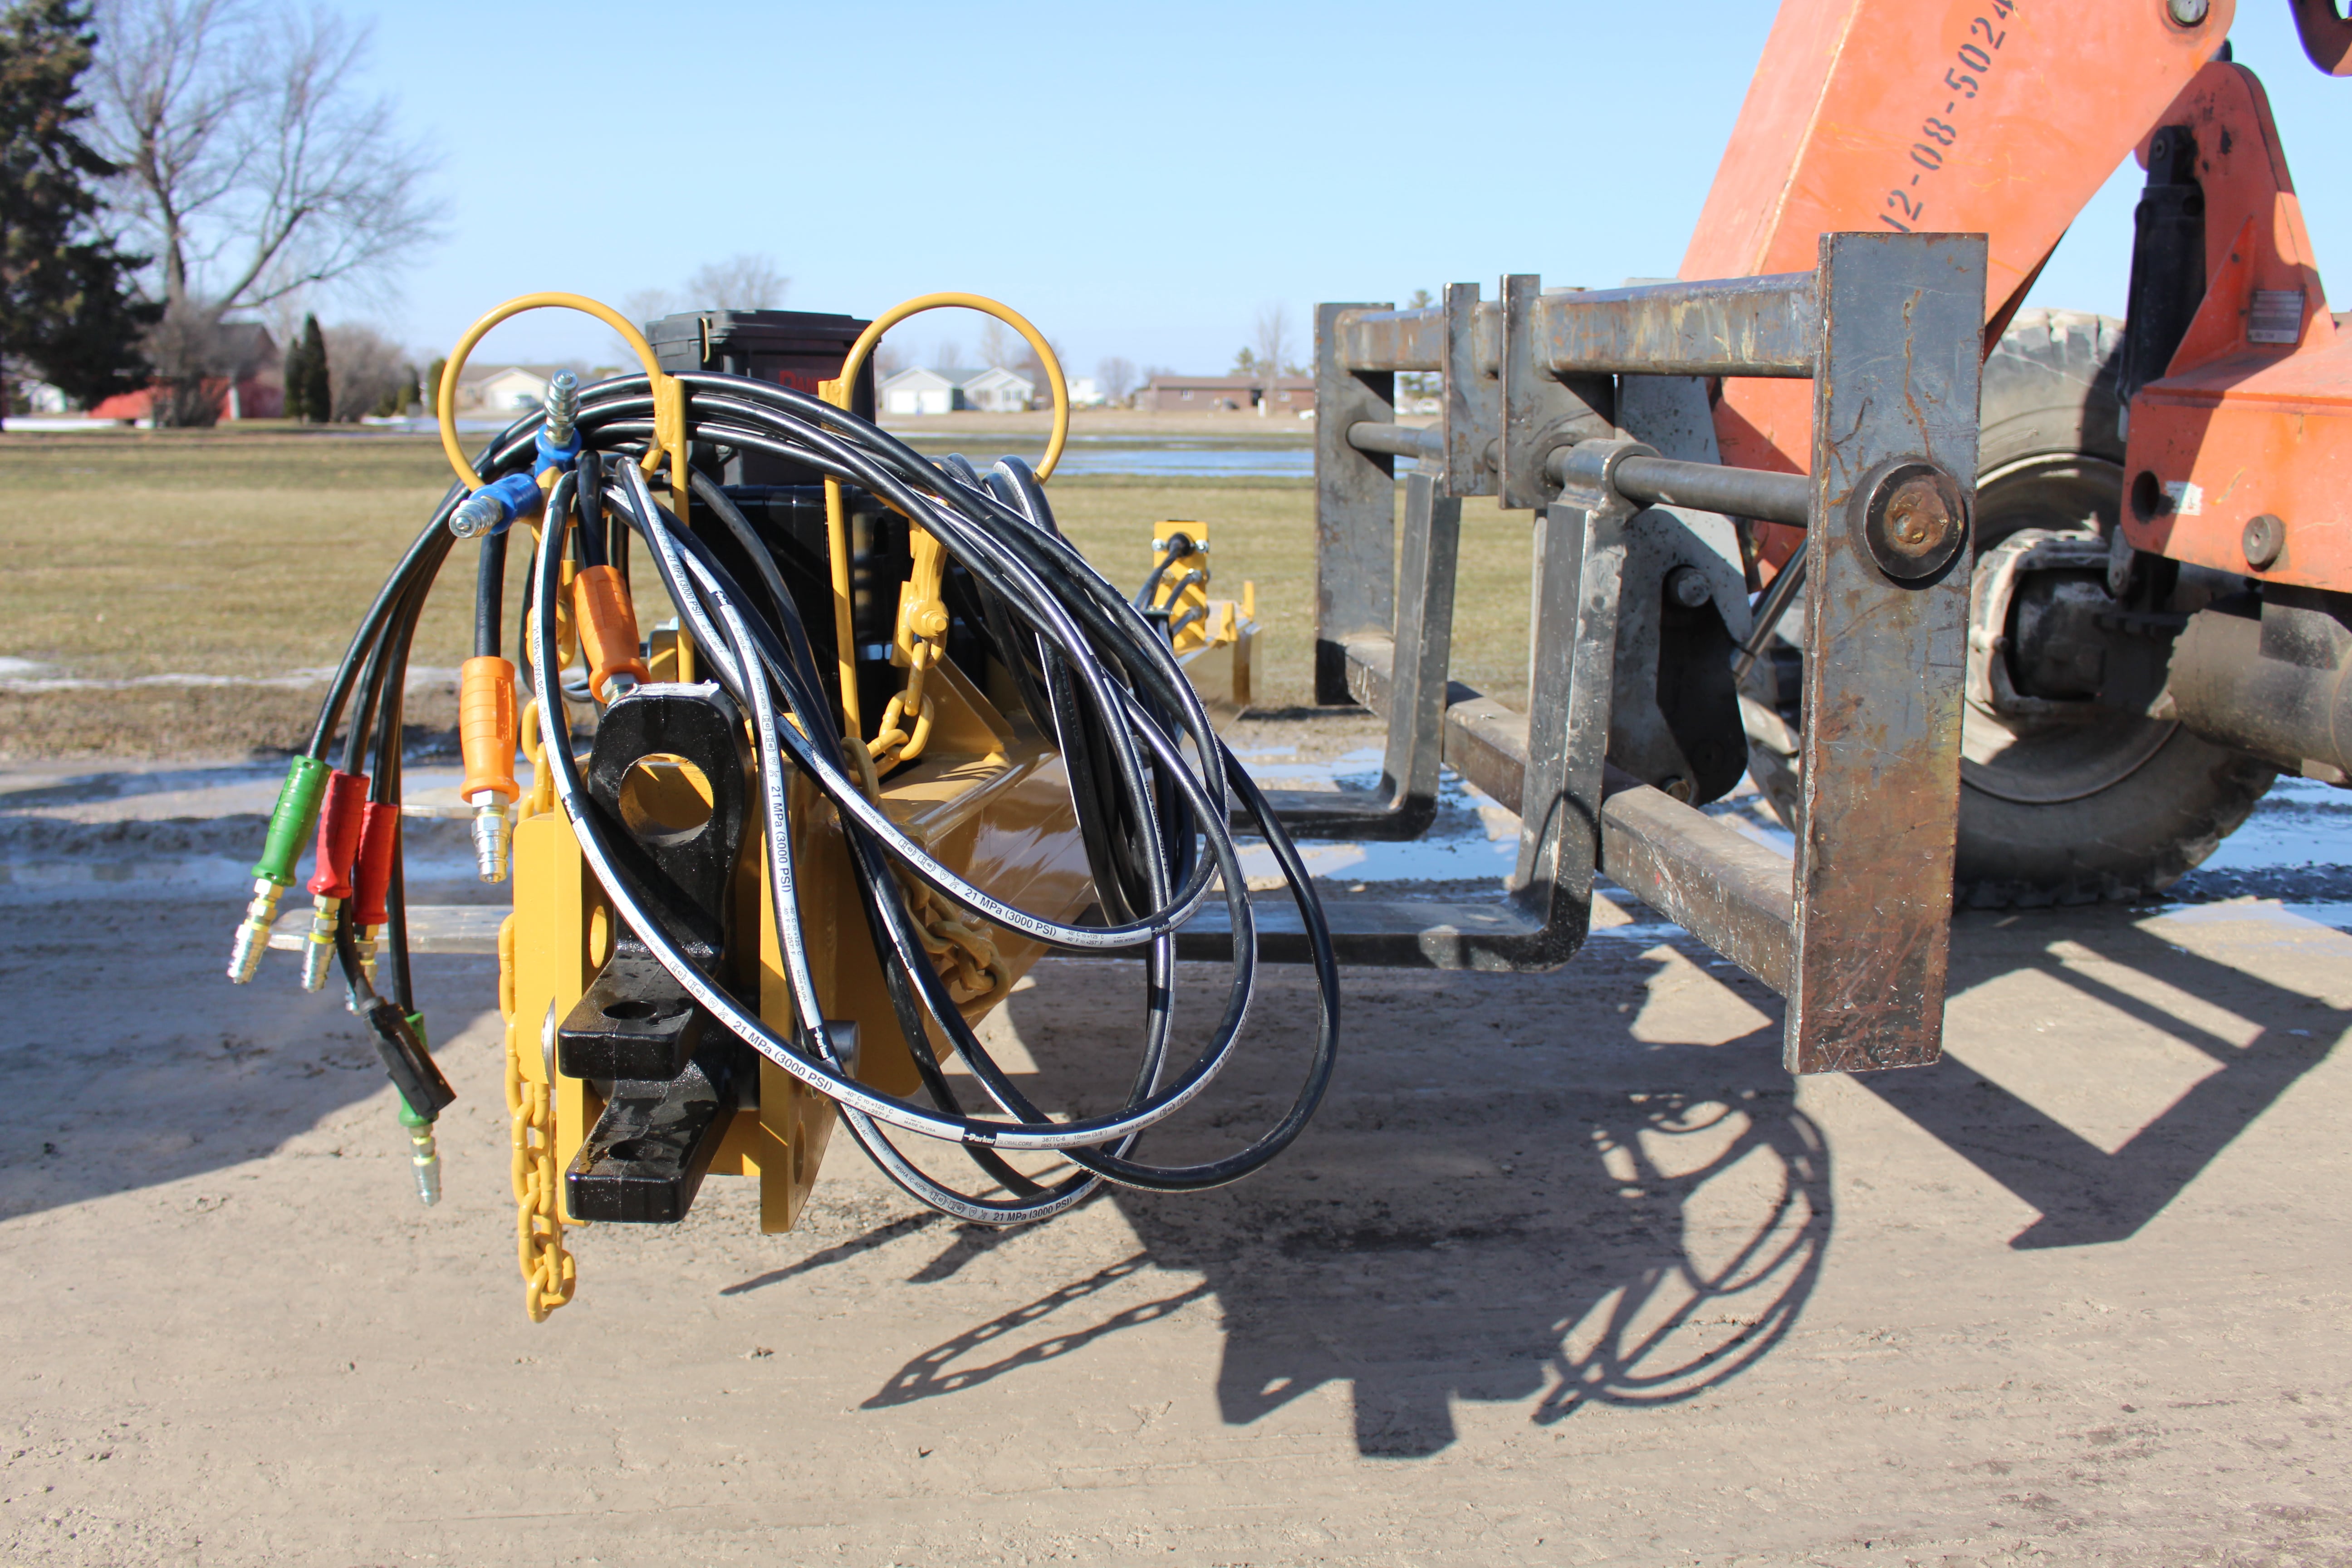
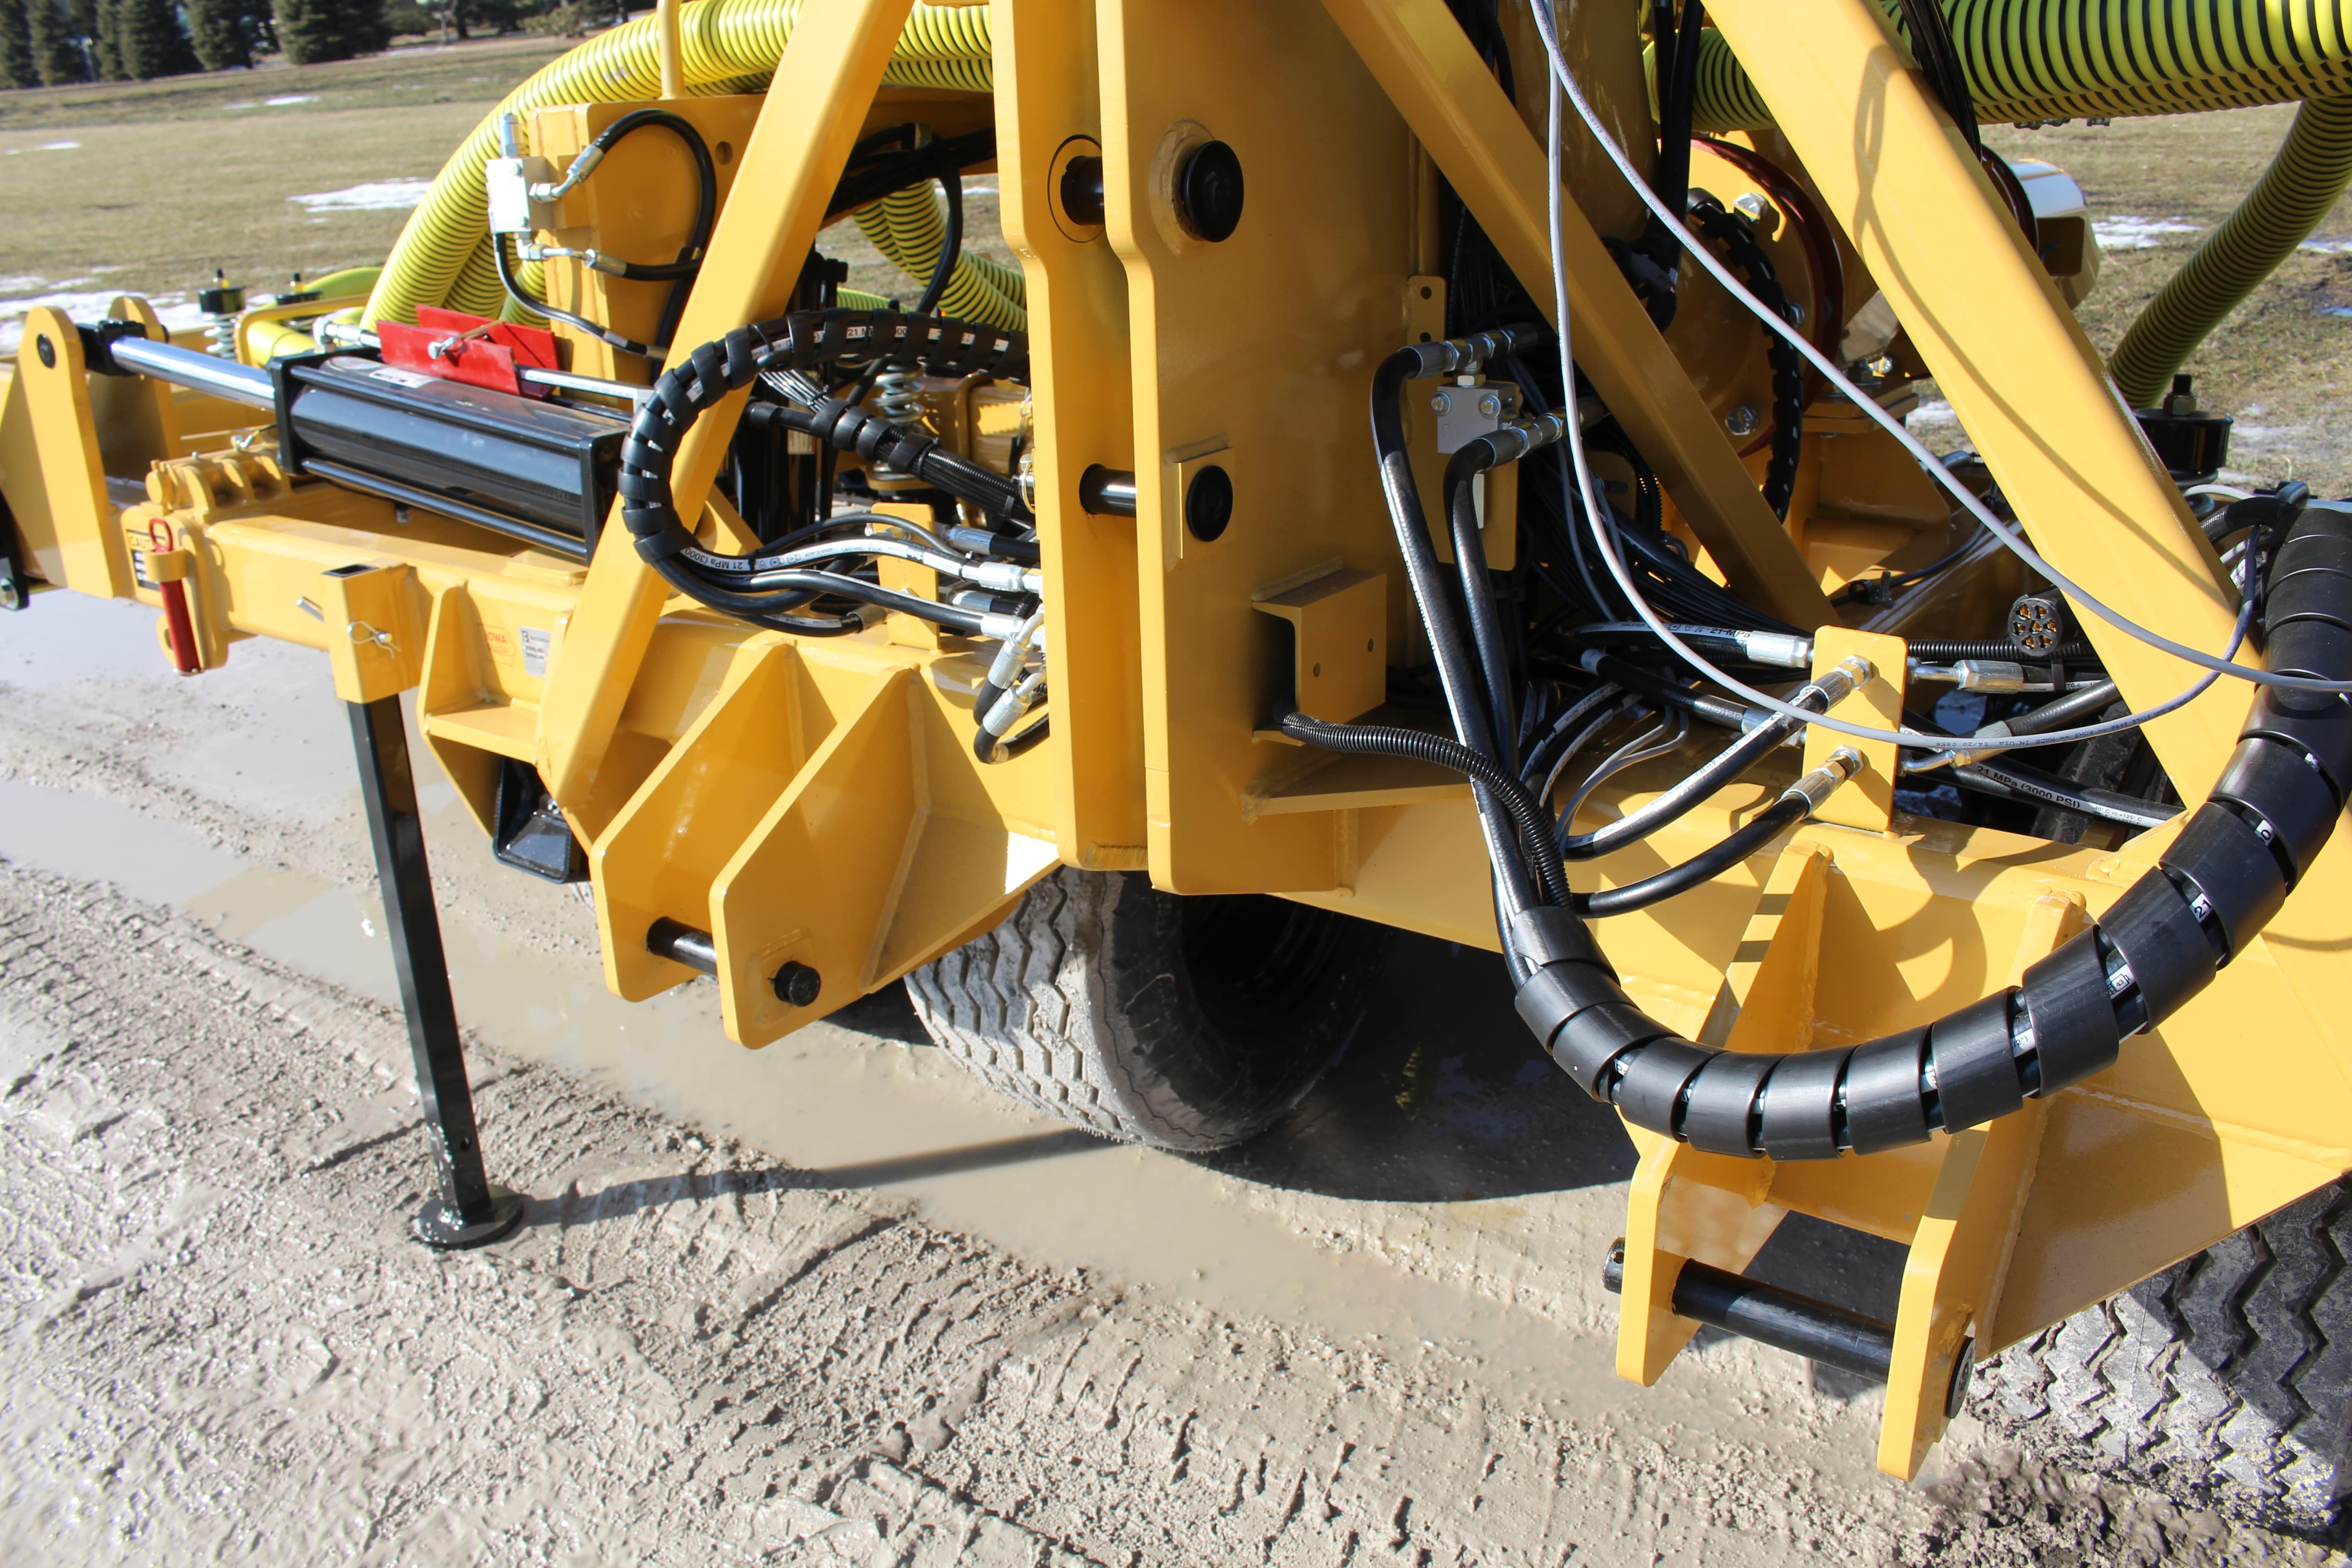
A majority of shared components between the pull-type and 3-pt. toolbar models are quick connections for user convenience. These quick connections include all hydraulic and electrical lines. These lines are routed to accommodate both applications without the need to shorten or lengthen them to reach a power source. Furthermore, there are several manual pins integrated on the toolbar’s tongue and tower that carry out the attach and detach process.
If you’re a time-driven person, this process will take approximately 30 minutes to complete.
Now, let’s get down to the nitty-gritty.
How-To Detach the Pull-Type Tongue.
STEP 1:
With the toolbar jacks secure on the ground, disconnect all hydraulic and electrical lines using the quick disconnect couplings, and pull the tractor away from the toolbar.
STEP 2:
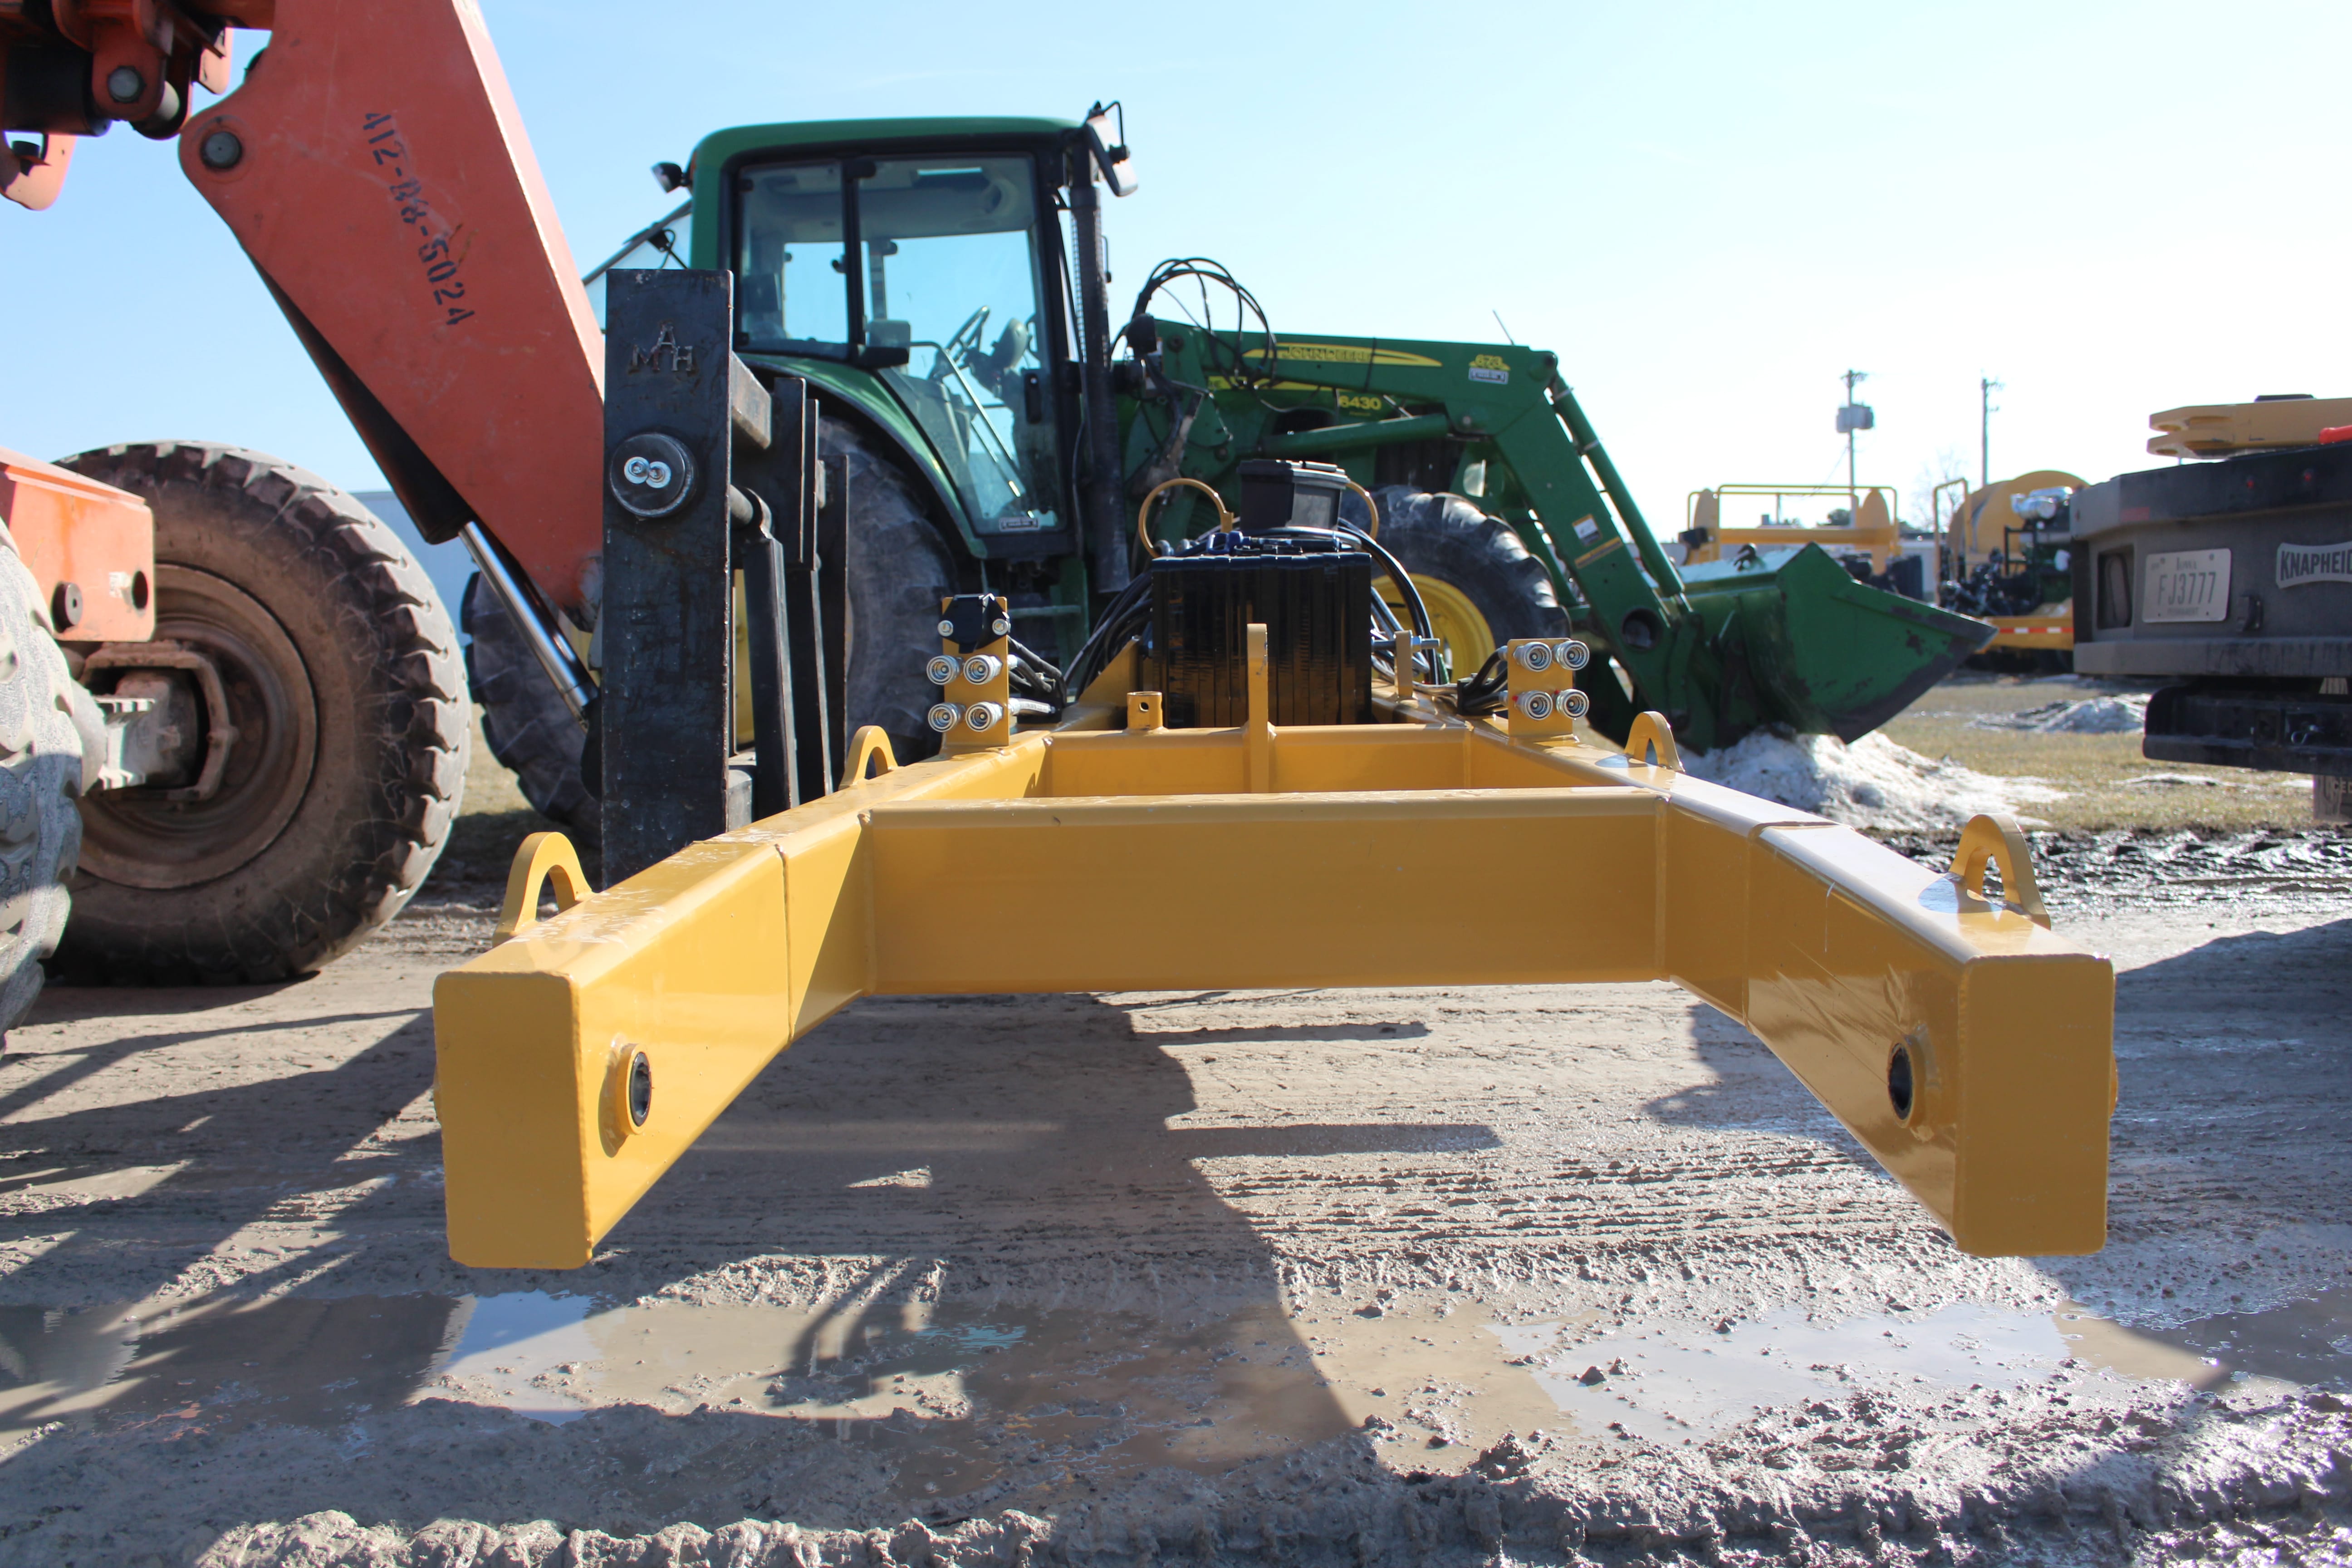
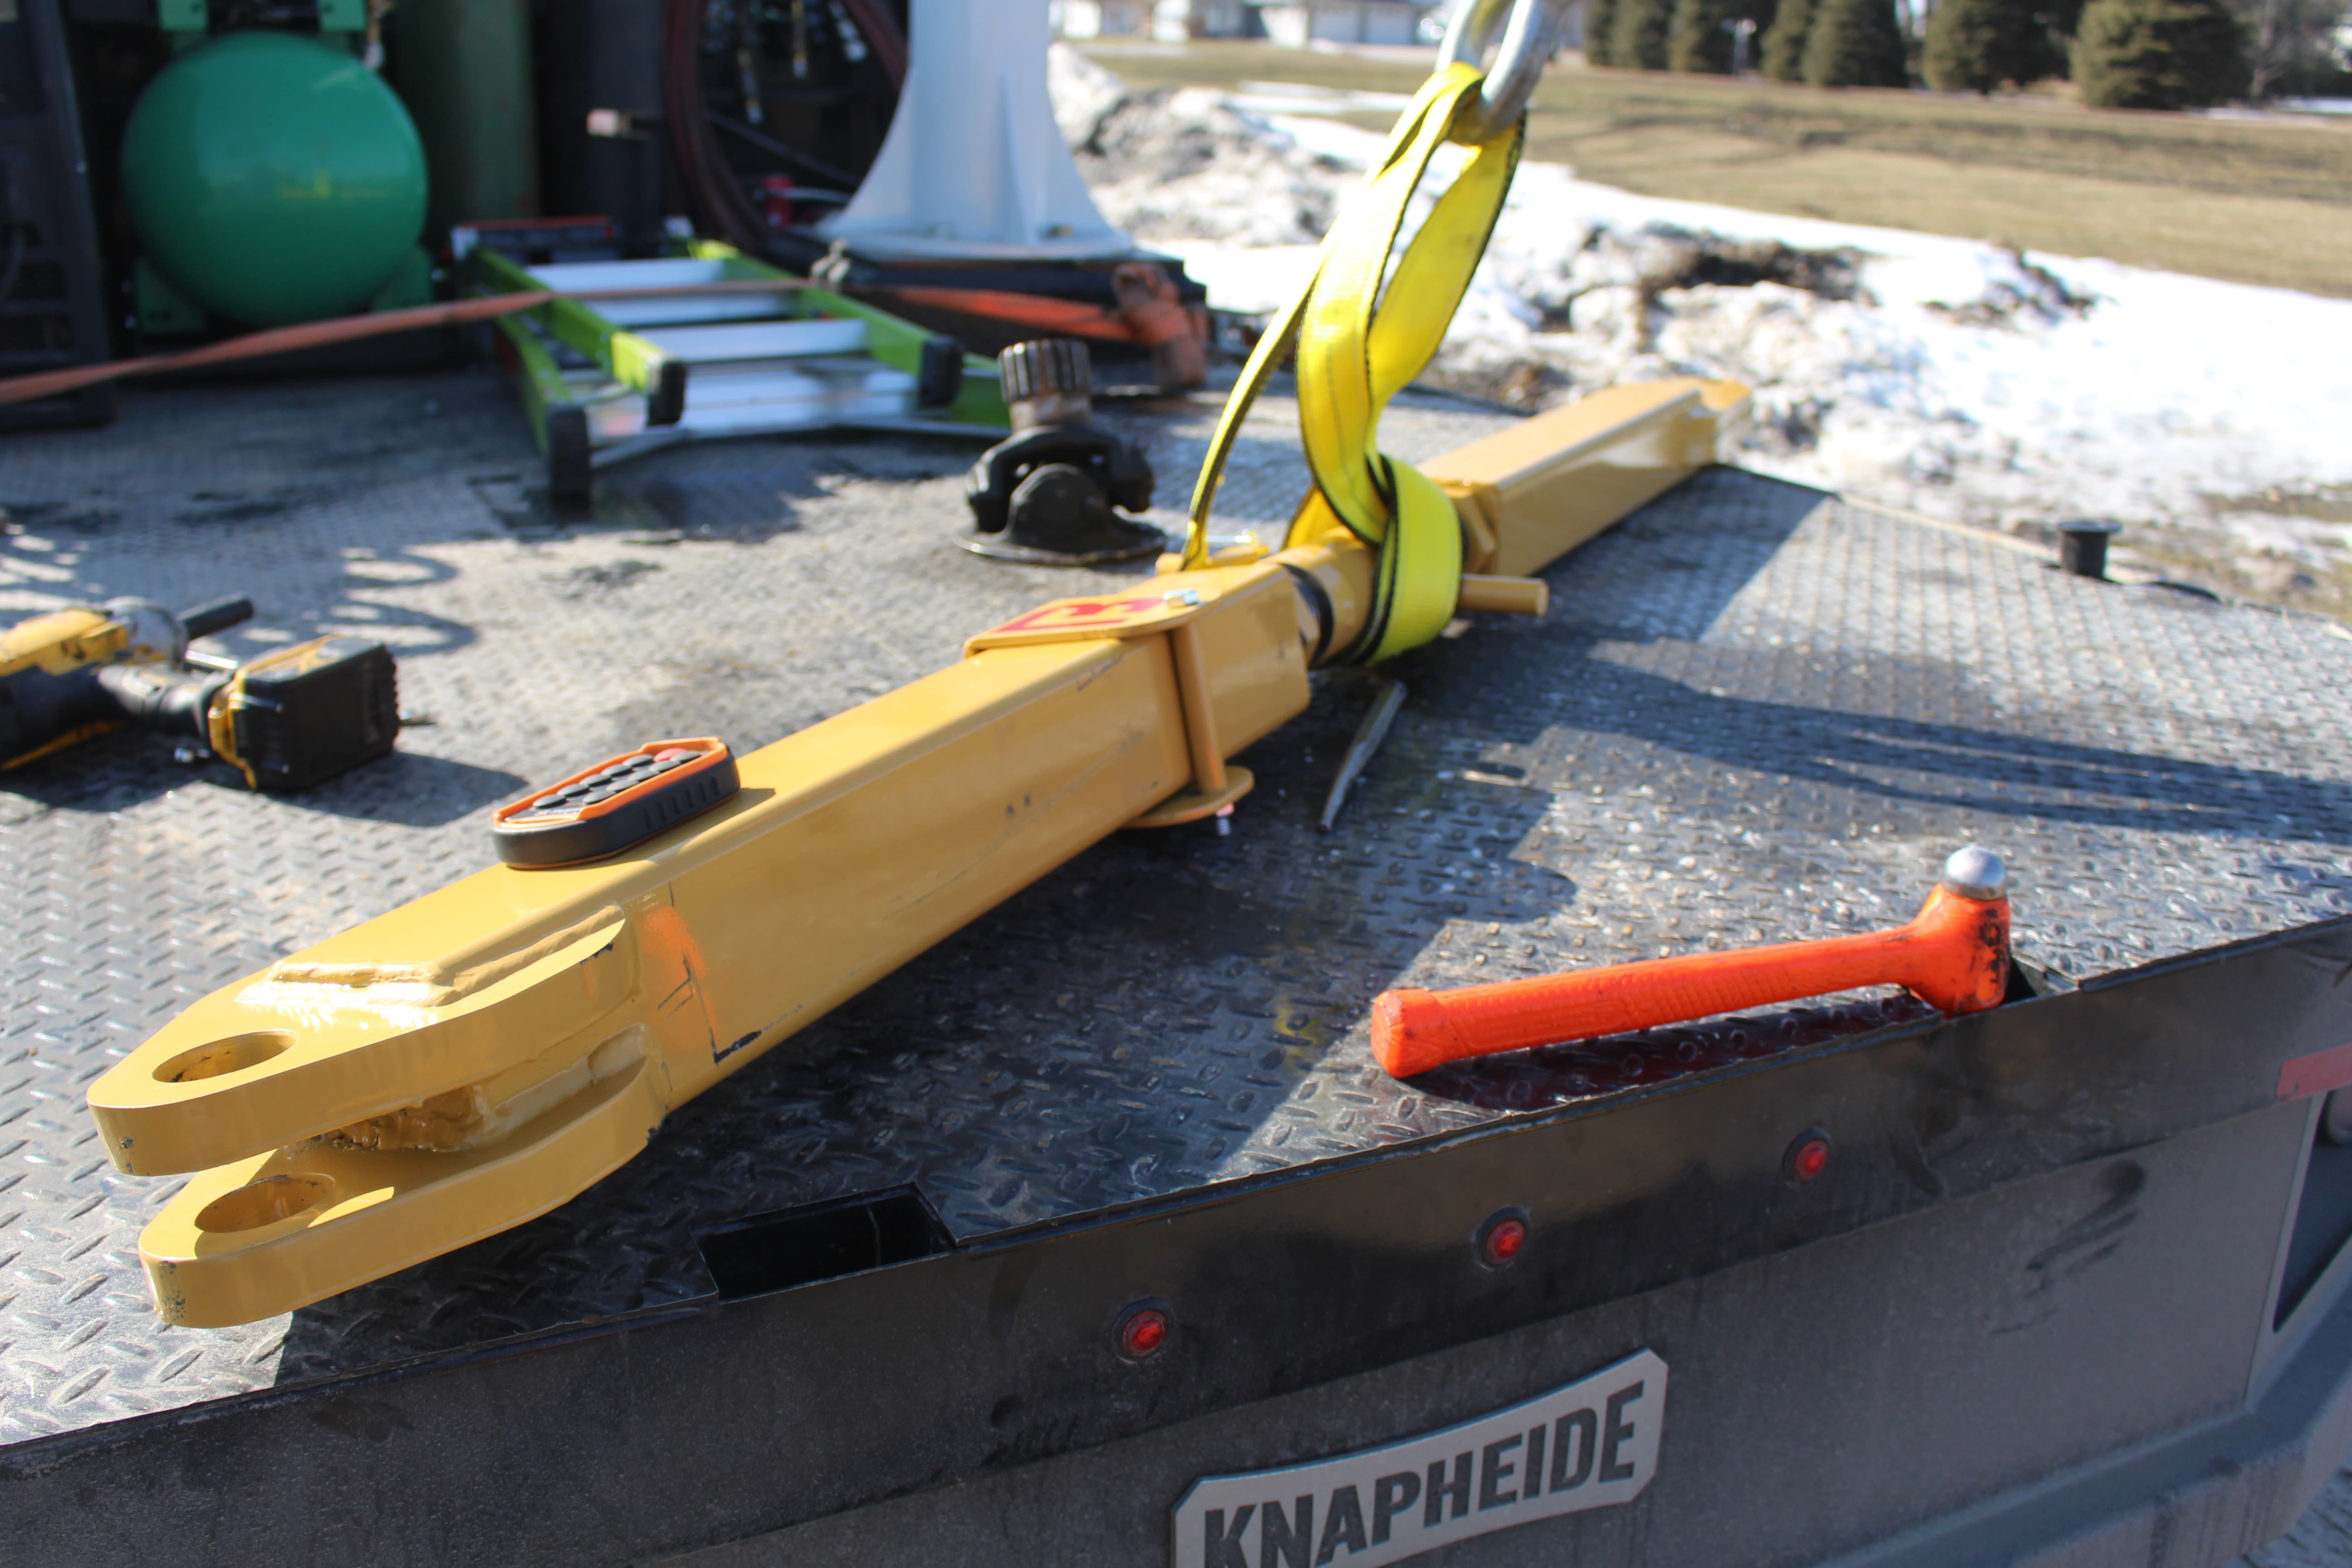
With the pull-type tongue supported with a skid loader or tractor, remove the manual pins located on the pull-type tongue. There will be three to remove: One on each side of the tongue and one in the middle section attached to the bottom of the tower support bar.

STEP 3:
Detach the pull-type tongue from the bar by using the skid loader or tractor to lift the tongue and move it away from the bar, or better yet, move it into storage while it’s not in use.
STEP 4:
Supporting the 3rd link with a skid loader or tractor, remove the final manual pin located on the top of the tower and completely remove it from the bar. Store the tower support with the pull-type tongue.

Voila! You’re 3-pt. Ready.
Now that the pull-type tongue has been removed from the toolbar, operators can back the tractor with a 3-pt. hitch attachment up to the toolbar, reconnect all hydraulic/electrical lines, secure all pins throughout the tower, and complete all universal 3-pt. locking procedures to ensure the toolbar is mounted properly.
Disclaimer: One aspect of the Flex design that is not a shared ‘quick connection’ is the Krohne Flowmeter cables. Standard procedures outlined by the manufacturer (Krohne Group) should be followed when reconnecting and disconnecting flowmeter cables. Essentially, the cables need to be reconnected to a power source on the applicator tractor.
It’s truly that simple.
Now that you have been introduced to the latest in our Standard Toolbar line-up, here are three things you can do:
- Contact our team of equipment specialists who are ready to answer any questions you may have.
- Visit the product’s webpage. This is a great starting point to begin self-guided research if you’re not ready to chat with one of our specialists just yet.
- If you’re one of those that knows what you want when you see it, click here to take a test drive.